

Techie Templates: Easy Ways to Create Tech-Infused Learning Activities
Written by: Shannon Quigley
 If you read the meme to the left and can relate, you are my people. When I taught Kindergarten I got anxiety about students logging in, following directions and being able to help 20 little excited learners at once. The truth is, we know that students coming to our classrooms can find apps on their tablets, watch endless videos on YouTube, and navigate and troubleshoot faster than awe can at times, however, that doesn’t mean they have the skills needed to showcase learning in a classroom. It’s our job to help students be comfortable using technology so that the technology isn’t the focus, the learning is. Utilizing reusable, predictable formats through templates and a consistent tool can help this happen for your students.
As educators, we know that the beginning of the year sets the stage for how our classrooms will work. We spend the bulk of time building relationships, talking, modeling, and developing procedures and expectations for nearly every aspect of school life. And even though our students are well-versed with technology, this is an area we need to spend time in to make sure our focus can continue to be on instruction and not the tech itself. I have found that by streamlining the tools that I use, I can increase the communication, collaboration, and creativity in lessons with my students.
In the examples below I’m going to show you how to use one program, Google Jamboard with three ready-to-use templates and ideas to keep kids active and engaged.
The Tool
Choosing a tool that you are comfortable with and that is easy to use for both you and your students is key when launching technology in your classroom. Research shows that when students are successful with their first interaction with content they build their self-efficacy and the results follow them throughout the year. This is why I choose to begin technology with Google Jamboard*. It is easy to use for younger learners, provides multiple options for annotation, and allows students to collaborate in a more controlled environment.
*If you read the paragraph above and aren’t a Jamboard user but are comfortable with another tool like Google Slides, Pear Deck, or Seesaw. USE THOSE. The message in the activities below isn’t about the tool, it’s about what you have students do with it. For continuity in this post, I am going to stick with one tool, but I want to make it clear there are pros and cons to every tech tool out there.
The Templates
1. Thin Jams
(Adapted from Eduprotocol Field Guide by Jon Corripo and Marlena Hebern)
 If you aren’t familiar with the Eduprotocol Field Guide (I totally recommend it, game changer!), it is a book full of practical, reusable protocols that you can use with students. The protocols are a mix of activities that range in complexity but are all highly engaging and allow for deeper level thinking. For me, the best part about these protocols is that they are student-centric, the whole motto of the book is “Teach More, Work Less,” and who can’t get behind that motto?!
The first template I’m going to share with you is an adaption of one of the Eduprotocol, Thin Slides. Now, if you’ve ever given students the assignment to create any type of slide show you know that you are in for the long haul. They’ve got transitions, they’ve got images, they’ve got fonts and boy do students take the time to create but is the same amount of time spent on the content?
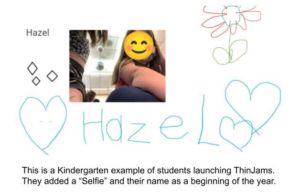
Behold the power of the Thin Slides. The premise behind Thin Slides is that your class will build a collaborative collection of thoughts around a single topic in a short amount of time. The teacher creates one shared learning space, in this case a shared Google Jamboard, hence the new title Thin Jams. The teacher gives students a topic and students have three minutes to add: One Picture and One Word or Phrase. That’s it.
After the three minutes are up the teacher does a quick check in around the room where each student has 20 seconds to make a claim or share an idea about their topic. Remember the key here is to keep it short, keep it focused, and keep your lesson moving.
Let’s take a look at some ideas that you could use with Thin Jams!
Beginning of the Year
 Spend some time learning the process and allowing your students to build relationships with one another in your shared space using some of these low cognitive load topics!
- Your Favorite Food
- One food you HATE
- Your favorite animal
- The best vacation spot
- One thing you know a lot about
- One thing you want to learn more about
Content Ideas
 After your students get comfortable with the process, here are some implementation ideas!
- Identify a character trait from a story or text
- Words/pictures in a word family
- Real life Geometry or Patterns
- One thing to summarize your learning
- Choosing a topic for research
- Exit slips
Resources
- Blank JamBoard (You will need to either add student names or assign each student a numbered JamBoard Space)
- Eduprotocol Book
2. JamBook aka The Digital Interactive Notebook
When I was teaching third grade I had my students maintain and create interactive notebooks for both Language Arts and Math. These notebooks served as our go-to for jotting ideas, sharing reactions, and saving graphic organizers. But as I reflect back on this process I also find myself questioning the amount of TIME it took to create these products. Did the time to create outweigh the goal of mastering the content? Could the time cutting and pasting into the notebook have been better spent on the conversation around what was put in? Hence, the development of the JamBook.
So why is the JamBook better than the Interactive Notebook?
Here are my arguments towards its use:
- Time Saving: By providing students with the templates, they can be in charge of customizing the content. New quarter, make a copy of the notebook and start again? Student “loses” their work? Revision History or Make a copy! I know there is a time and place for small motor work with scissors and glue (trust me!) but I don’t want to use my 90 minute ELA or Math block to do that work.
- Collaborative: Most of the work in our classes focuses on the 4C’s and collaboration is so easily done with this notebook. You can have group notebooks where all students contribute (book clubs, STEM Time, etc) and all students can access the content, contribute and work, AT THE SAME TIME. Mic Drop 🎤.
- Versatile: I know I mentioned it above, but I like Jamboard because of the variety of content. Students can utilize the pen features, add Images, organize content with sticky notes and beyond.
Content Ideas
Having students open up a blank Jamboard to use as a whiteboard is quite simply the easiest go-to use of an interactive JamBoard notebook. It can function as a place for word work or independent readers’ notebooks. Essentially it can function as a higher level of a Whiteboard and Marker (that can save content!) and, bonus, you never have to worry about the students losing their marker caps!
What’s nice is that depending on the devices of your district, students can utilize their boards during whole or small group reading and during independent work time. In our primary classes we have iPads, so students often come back to the carpet, open their Jamboards and can participate with active learning listening strategies. If you want to provide more structure to the notebooks here are some ideas that you can use with students!
- Provide a frame with Virtual Letter Tiles or Manipulatives (less cleanup more work time!), students can use and reuse this page each day
- One location for reusable graphic organizers (use a T Chart for examples/nonexamples)
- Sticky notes can be used to track their thinking before, during and after reading.
- Students can create character analysis using colors, images, and text.
- Students can have “notebooks” that are reused daily or you could create one that is focused around a book study or content.
3. Group Jam Sessions
 Even though this is the third template I would challenge you to think about how you can begin building up to a Jam Session with your students. Collaborating with other students is at the heart of our learning, and Google Jamboard gives students the perfect space to do this. When you share a Jamboard with a group of students and provide them all “edit” rights, something magical happens. The group has to communicate and talk about how they will reach the intended goal, if not there is chaos.
As I mentioned above, a successful shared Jamboard does not happen by accident. It is best introduced when you have had classroom conversations about working together, practiced how to communicate, and discussed the importance of shared responsibility of work. But when your students are ready, sit back because it is SO worth the time investment. Let me share with you an example I saw in one of the Kindergarten rooms I work with.
The shared JamSession varies from the work we did with Thin Jams. In that example, each student had a dedicated work frame. In a JamSession, multiple students work within the same frame. I first saw this working in a Kindergarten classroom, and boy was I nervous on how this would play out.
Students were working on word families, specifically the initial S blend. Each team of students was given a frame in their class Jamboard that contained a frayer model. In two of the squares they were to find pictures of words that have the blend, in one box they wrote words they knew and IF THEY HAD TIME, they wrote a sentence in the fourth box.
As I circled the room, what I saw was amazing. The kids were using what we had taught, assigning roles, “Katie, you add the picture this time, I’ll help you spell the word,” “Does anyone know how to spell snail?, “Amari, can you make my picture smaller?” And guess what? They were having fun. I heard actual cheers when they got to write a sentence. Let me say that again. THEY CHEERED FOR SENTENCE WRITING. By giving kids the tools, the confidence and collaboration tools, a simple word building lesson was amplified to a much higher level activity.
Shared Research Jam
- Each group is given a topic. Every student in the group contributes to the board using a certain colored sticky note. At the end the group uses all of the notes to write one paragraph, paper, etc. on the topic using collective note taking
Problem Solving Jam
- Give each group a different problem to solve. All their work and answers must be shown on the group jam board. At the end, other groups evaluate the work and provide feedback and discourse around their work.
Word Sorts
- The group is given a vocabulary topic. Group members must collectively decide how to categorize the words.
If you were waiting for a sign to start thinking about how you can maximize student-centered learning I hope that this post shows some easy ways you can do that. The samples above are not all inclusive and I encourage you to collaborate and customize as the year goes on. However, remember to start small, get the routine, and then sit back and watch your students work and learn.
Resources
Please login or register to claim PGPs.
Alternatively, you may use the PGP Request Form if you prefer to not register an account.
